Tag Archives: 35×35

30 minute heating pad

IMG_8924_edited-1

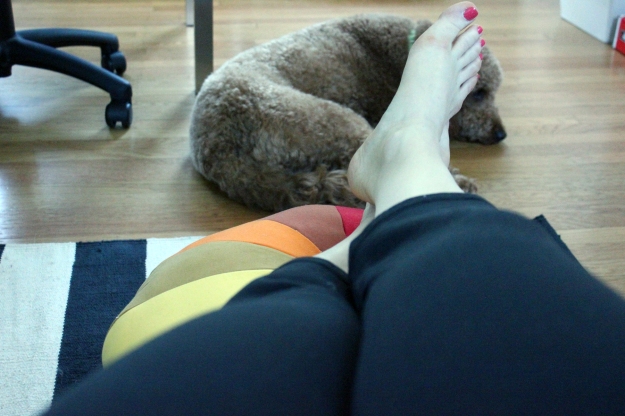
As I’ve been interrogating friends with kids to make sure I have the bare necessities, Lauren mentioned that having a heating pad for future nursing aches and pains would be nice. I could have run out to Walgreens and picked one up for $10, but since I’m pretty desperate for anything to pass the time right now I decided to make one. After browsing Pinterest for a few ideas I jumped in and put one together in less than thirty minutes. hotpad1

I used flannel fabric I found in my fabric stash (no clue what I bought it for originally or how much it cost) and cut two rectangles. They ended up being 16.5″ x 6.5″. I didn’t have any specific measurement going in, just eyeballed what looked good.

Turning the right sides to face each other, I sewed the two rectangles together leaving about a 2″ opening on one side.

I then turned it right side out and poked the three corners out. To give it a little extra reinforcement (I really don’t want a rice explosion at any point), I went ahead and stitched around the outside, still leaving the 2″ gap open.

IMG_8919_edited-1

I picked up the cheapest bag of rice from Safeway. There are other materials you can use (beans, for example), but rice was easy and cheap.

Using a funnel I made with a piece of paper, I dumped about a third of the bag in through the opening. Then I sewed a vertical line to keep that rice in it’s compartment. I repeated a second time. For the final compartment, I dumped in the remaining rice and then sewed the 2″ opening shut.

You don’t need to make compartments, but it was relatively easy and this keeps all the rice from pooling in one side of the pad. I can see this being useful if you’re using it lying down.

IMG_8921_edited-1

I made this incredibly simple because it’s for my own use. If I were making it for someone else I’d do a better job of measuring my compartments (they definitely are not even) as well as dividing the rice before pouring it in (again, not quite even amounts).

IMG_7072_edited-1
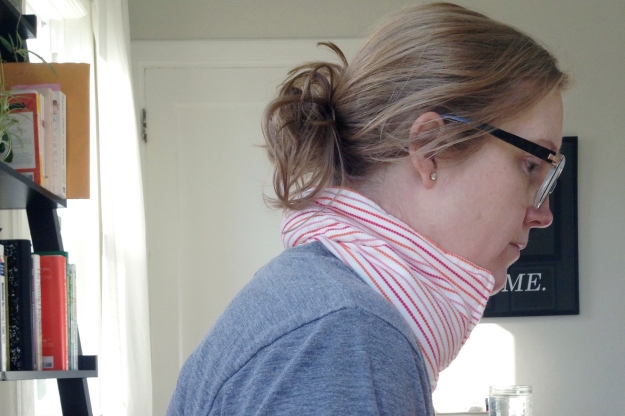
I warmed it in the microwave, along with a glass of water (I read that the steam will keep the rice from burning), and was pleasantly surprised to see that it stayed warm around my neck for about 30 minutes.

Project: 15/35
Time: 30 minutes
Tutorial: inspired by browsing Pinterest
Cost: $1.50 (one bag of rice)

because we needed another blanket

IMG_8891_edited-2

After finishing the first knit blanket for the martian my plan was to make him or her a quilt. I had just finished Sloane’s toddler quilt though and realized there was no way I could managed another one at eight and nine months pregnant. I still wanted something bright and colorful and decided to revisit the Purl Bee baby blanket pattern for a third time (one, two).

kersti_super_easy_baby_blan

PC: Purl Bee

I loved the colors used in the tutorial – they were gender neutral and reminded me of sunset over the ocean. The yarn kit is $105 and I wasn’t really looking to spend that much. Off to JoAnne’s I went, looking for similar colors. The only line of yarn I could find that had a decent match to the colors was Vanna White’s. I’ve used it before but would like to move away from it as it’s acrylic. The colors aren’t quite as bright and vivid as the more expensive yarn, but I still ended up really liking the final product.

IMG_8901_edited-1I would be lying if I said I expected to finish this before the baby arrived. I am trying to look at the bright side – who knows when it would have been finished post baby. And now I have another option for staging baby photo shoots. But I would still really like for this kid to make an appearance. Soon. As of the writing of this post (11am on Friday, 2/20), no baby on the horizon.

IMG_7025_edited-1I started with the dark orange and until I added the final color I really wasn’t feeling the blanket. It felt blah and muted. The oranges and yellows with just the light blue looked really off and I almost didn’t want to finish. That was probably more pregnancy frustration speaking, it rears it’s head in odd ways. Something about the final color, the teal blue, made it all come together and work for me. I’m loving it.

IMG_8911_edited-1I’m getting better at casting on the correct number of stitches for my desired size. This blanket was intended by to 40 x 63 inches and turned out to be 43 x 59. Pretty close to the ratio I was going for. What’s funny is I didn’t realize just how large that would be. It’s definitely not a baby blanket for swaddling or over the carseat, but perfect for me to use when I’m down in the nursery or for the baby to play on.

IMG_8890_edited-1I did have to go back and buy a second skein of each color as I was only about to get through about 2/3 of each color with the first skein. Next time I use this pattern I’ll keep that in mind and follow the same proportions but make the dimensions a bit smaller.

IMG_8898_edited-1

Project: 14/35
Time: 2 months of TV time
Tutorial: none, but inspired by Purl Bee baby blanket pattern
Cost: $56 (2 skeins each of 7 colors of yarn @ $3.99)

tissue poufs

IMG_8827_edited-1

My original plan for the crib corner of Martian’s room was to hang this adorable (and oh-so-nerdy) solar system mobile from Pottery Barn. I will explain this next week when I share pictures of the baby’s room, but the room was inspired by Neil deGrasse Tyson and the Enjoy It blog by Elise Cripe. Yes, that’s weird and I’m willing to guess it’s the only nursery ever to be inspired by these two people, but stick with me. It’s adorable.Screen Shot 2015-01-29 at 9.00.45 AM

When we unpacked the mobile to hang it the other night it was about 4 times as large as I had expected it to be from the photos. Greg was concerned about how heavy it was to be hanging over the crib. Then we found the tag that said “do not hang over crib”. We tried various locations in the room but given our short ceilings (our bedrooms are in the basement) and the smaller size of the room, it just wasn’t going to work.

So on to plan B and a new craft project for me. I wanted something colorful, on the cheap side, and easy and quick enough for a nine-month preggo to do in short order now that we’re in “any day now” territory. I honestly don’t love the idea of mobiles to begin with, it was more the solar system that had me captivated so I switched gears to tissue paper poufs. I had previously seen them on Elise’s blog in her little girl’s room and Lauren recently added the poufs from Sloane’s first birthday to her room décor. It seemed like the thing to do.

IMG_8812_edited-1

I searched Etsy to find pre-made poufs but wasn’t able to find a single source that had the selection of colors and sizes I wanted. I ended up taking the suggestion from Elise’s post on making her poufs and buying tissue paper to make my own. I found the colors I wanted at the store she recommended and was able to buy the amount of each that I wanted, which turned out to be at least double how much I actually needed. If you’re on my gift list, expect colorfully wrapped gifts for the next few years. I was impressed with how quickly I received my paper (two days!) but was a little annoyed that they only offered Priority Mail shipping, which was 50% of the total cost of the tissue paper itself.

IMG_8814_edited-1

This project, unlike most, was much easier than I expected. I followed Martha’s instructions and created 16 different sized poufs. For each one I used eight sheets of paper. The large are eight full sheets, the medium are eight with one quarter cut off, and the small are eight cut in half (also known as four). To add different textures, I trimmed some round, some pointy, and some I did not trim at all.

I have bought pre-made poufs before for parties and for whatever reason I think it took longer to “pouf” those (they come folded up) than it did to cut, fold, and pouf these myself. I had settled in for a long day of working on this and was pleasantly surprised that even with clean up I was done in less than two hours. It didn’t end up being as cheap as I’d hoped, but at the moment I’ll take quick wins over cheap wins (sorry Greg, I’m almost done spending money!).

IMG_8826_edited-1

It took me about an hour to arrange and hang (using fishing line and flat, white thumb tacks). I used just over half of what I made. I might add more, but for now I think it looks good without going overboard. Its so hard to take good photos with the light we have downstairs and these are a bit darker than they look in person.

Project: 13/35
Time: 3 hours (2 to make the poufs, 1 to arrange and hang)
Tutorial: good ol’ Martha Stewart
Cost: $50 ($40 for paper ($17 in shipping!) and $10 for fishing line, thumb tacks, and floral wire)

yet another blanket

It’s clear I have an obsession with making blankets. I really like to curl up in them and am assuming this is why they’ve become my favorite craft project.

IMG_8803_edited-1This is the first blanket I made for Martian. I’m excited it’s one of the few blankets that I’ve made that will stay at our house, as most of them have been gifts. I originally started with cream, gray, and olive. It’s so hard to pick gender neutral colors. Once I got started the olive didn’t feel right so I dropped it and went with just cream and gray. (My photos came out very gray and white, but it’s actually much more cream.)

IMG_8801_edited-1At some point while knitting the blanket I looked at the skein wrapper and realized it was hand wash only yarn. I had just picked the softest yarn I could find at JoAnne’s in colors that I liked. Whoops. Rookie mom mistake. I guess this will be more of a special occasion, photo blanket. I’ve already got a second knit blanket started in washable yarn.

IMG_8806_edited-1I’m still trying to improve proportions. The intended dimensions of this one were 32 x 39 and it turned out to be about 29 x 44. At least I managed to get the stripes going the direction I intended them to go! Here is my model helping to show off the size of the blanket.

IMG_8605_edited-1A few rows in, I realized I was going to have a mess of tails to knit in after I was done. Knitting all the tails in is my least favorite part of knitting by far and I hadn’t thought about how bad it would be by switching colors every two rows. The tails above are just from one gray and one cream stripe. I went in search of a better way and YouTube totally came through. I learned how to knit the tails in while you start the next color. It makes one side of the blanket ever so slightly more bulky, but it’s hard to tell. And very much worth the time savings. Love that I keep learning new techniques with each project.
IMG_8796_edited-1

I was hoping to share some photos of the baby’s room this week, but the awesome solar system mobile I ordered from Pottery Barn turned out to be huge and just didn’t work in the room. (Yes, we’re doing everything in our power to make sure this kid is a nerd.) I’ve moved on to plan B, but it will take a week or so for that to arrive and some time for me to put together and get hung up. Hopefully it will be ready before Martian makes his or her arrival, but I’m not stressing.

Instead a little peak of the blanket in the room, just waiting for it’s person to come home and snuggle. As we all are!

Project: 12/35 (I just turned 34 last Monday which means I have 12 months to complete 23 projects. Yeah.)
Time: 3 months of TV, plane, and road trip time
Tutorial: nothing for the knitting, but I used this video to learn how to knit in the ends as I went
Cost: $30 (six skeins of Paton’s Classic Wool Yarn, on sale for $4.99 each)

the (unintentional) toddler quilt

Back in June my best friend and I were discussing potential first birthday party themes for her daughter, Sloane. Eventually she settled on going with a girly color theme of coral and mint. My very first thought was “that would make the most adorable quilt”. Then reality hit and I remembered I was a few weeks out from my midterm and in middle of the first trimester. Quilting wasn’t high on my priority list, but I knew eventually I’d get around to making Sloane a first birthday quilt.

IMG_8741_edited-1

It’s just the sweetest thing, so girly with all the soft colors and lots of white.
IMG_8748_edited-1

I used six different fabrics for the top, plus a striped fabric for the binding. I mixed gold in as well because I’m currently obsessed. The polka dots and pink birds were intentional to make it a little more toddler friendly. I thought about using coral thread for the quilting though I ended up going with white. I think I’m happy with that decision but not sure. The coral might have added a bit more fun. IMG_8743_edited-1

The back is a simple light gray crosshatch. I found this fabric at Joannes (everything else was purchased through fabric.com) and I think it might be perfect for pretty much every quilt backing. IMG_8746_edited-1

On to the confessions. I’ve found that with each quilt I learn something new, which is awesome. On this particular project I learned several something news.

First, the quilt is half the size it was intended to be. I’ve only made 60 x 44 quilts, which is a great size for adults (and it’s the largest size you can make while still using regular fabric for the backing). My math went wrong somewhere when I was calculating how many triangles I needed. I think I took the total number of squares and at some point divided in two one too many times to get the number of triangles. When I laid it out on the floor I realized it was more like 30 x 42. For about two seconds I thought about cutting more fabric and making it full sized. Then I realized that this quilt is for an 18 month old and this accidental size is just perfect. I also remembered that I was seven months pregnant and my back hurts. Quilting is back breaking work, so I quickly moved on.

I’ve had my sewing machine for a little over a year now and I feel like I’m finally figuring it out. I realized there is a thread cutter on the side of my sewing machine. Now I don’t have to pick up my scissors every time I need to cut the thread. This saves a huge amount of time and I feel like a bit of an idiot for not realizing it was there before. I also broke two needles making this quilt and so learned how to change the needle. The striped binding fabric is a little thicker than normal cotton and I had trouble with sewing through all the fabric on the corners.

IMG_8749_edited-1

Happy (very belated) first birthday, Sloane!

Project: 11/35
Time: ~10 hours
Tutorial: no tutorial (I can quilt on my own now!), but the layout was inspired by this
Cost: $43 (fabric was about $40 and coral thread for binding was $3; batting from my stash)

holiday wrapping paper

IMG_8563_edited-1Last year I purchased a very large roll of brown packaging paper. It’s seriously giant – a workout to move in and out of the closet. I use it for pretty much everything, from mapping out gallery photo walls before making nail holes to wrapping gifts. For Christmas this year I thought I’d go really simple and stamp the paper using paint and a sponge. There probably are better ways to do this (and I’m sure Pinterest can point you to them), but here’s what I did.

holidaypaperIt’s nowhere close to perfect. But that’s not the point of handmade holiday items, right? I dropped the sponge a few times and not every tree is well formed. I’ve moved on and love it. The sponge actually soaks up a ton of paint. I average about eight trees per dip, even with blotting the sponge after dipping so that it wouldn’t drip. Your hands will be messy, but acrylic/craft paint washes off easily with soap and water.

A note: While this is my first time using a sponge and paint, I have created wrapping paper using stamps and ink in the past. I highly recommend creating your pattern before you wrap as it looks much more like wrapping paper than if you wrap and stamp after only on the exposed paper.

IMG_8577_edited-1


To go with the paper I used gold ribbon that my mom picked up back in 2012 for any wedding ribbon emergencies we might encounter. We didn’t have any and I’ve had 30+ spools of gold ribbon for a while now. Glad to be putting them to good use finally. All of our gifts will be shipped so instead of gift tags that might rip off, I went through my scrapbooking supplies and pulled out a few sheets of white and gold letter stickers. Love how (aside from the sponge) I didn’t buy anything new for gift wrapping this year and am putting craft stashes to use.

Project: 10/35
Time: 30 minutes
Tutorial: n/a
Cost: $0.50 for a sponge (I already had the brown paper and white acrylic paint)

a ‘welcome to the family’ quilt

IMG_8495_edited-1

Over the summer I gained my fourth sister when Joey married Brittany. I had grand plans of making her a quilt as a shower gift. I bought material, came up with a design, and started on the project. Back in May. Then I put it on the shelf and during the first trimester and while finishing school, that’s where it stayed. Over the past few weeks I dusted it off and finished it, just in time to deliver it in person over Thanksgiving.

PUrple

Brittany loves purple and I wanted to do something in all solids, without any busy patterns. Most of the local craft stores don’t carry a large selection of solid colors, so I tried fabric.com for the first time. Overall I’ve been really happy with buying from them. You can create a design wall (above) to see how your various fabrics look together. I added all the purples I could find and mixed them around until I came up with 7 or 8 I liked together.

IMG_8062_edited-1

In person they were pretty true to the color on the screen. By this time I’d decided to go with a square patchwork quilt. This is the first time that I can think of when I made up my own design for a craft.

IMG_8065_edited-1I picked six of the colors for the top of the quilt and cut them into 3.5″ squares. In retrospect this was pretty small and meant a lot of cutting and sewing. But I love how it turned out so it was worth it.

IMG_8077_edited-1

The seventh color I saved for the binding and cut it into long strips until I had about 220 inches, or a little more than the perimeter of my total quilt.

IMG_8092_edited-1Then I started sewing squares together. I definitely should have planned this better. Instead, I just keep adding on, making really big squares and rectangles. I think if I had been more methodical, the corners would match up better in the finished product.

IMG_8094_edited-1When I left off in May, I had about half a quilt top sewn together and the rest of the squares just cut. I picked it up this month and finished the top first. Then I went to the fabric store to pick out a backing. I had originally bought a polk dot fabric, but it seemed a little juvenile. Instead I found a geometric black and white pattern that was still basic and not too loud, but seemed like a better fit for the look I wanted.

IMG_8457_edited-1

Note the difference between lovely May light and less than lovely November light here in the PNW. Next up was deciding how to quilt the top, the batting, and the backing together. I decided to go down both sides of every row and column. It looks great, but I had no idea what I was getting myself into. The only other quilt I’ve made had 15 lines of quilting on it. This one had 68. I underestimated just a little how long that would take.

I also underestimated how hard it would be to quilt at six months pregnant. I forgot just how much arranging, lining up, and pinning fabric happens on the floor. I’m not super mobile these days, but made it work.

IMG_8487_edited-1

I used white thread after having a hard time deciding on a color. I thought about silver or gold, but in the end just went with white. On the front, it really brightens things up a bit. IMG_8488_edited-1And on the back, it doesn’t take away from the pattern itself at all. I wasn’t sure about it at the time, but after the fact I think it was a good choice.

IMG_8484_edited-1

IMG_8485_edited-1

IMG_8491_edited-1

One of these days I need to make a quilt that is going to remain on our couch! I have one more in the queue before I start on Martian’s quilt. Hopefully it will be done before s/he arrives. IMG_8492_edited-1I added ribbon and an ‘I made this for you’ tag that came in the first Happy Mail box.

Project: 9/35
Time: not sure; somewhere around 15 hours in the last few weeks plus five hours in May
Tutorial: n/a
Cost: $50 ($20 – top and binding fabrics; $6 – thread; $14 – backing fabric; $9 – batting)

the black and white blanket

IMG_8330_edited-1

Some project are labors of love but the anticipation of the finished product keeps you going. That is exactly how I felt while making this blanket. I first saw the style on Elise’s blog over a year ago. It wasn’t until after I successfully knit a blanket for a friend’s baby that I decided I could take on this one. 
IMG_8338_edited-1

It was actually quite simple once I dove in, seeing that it followed my typical rules for knitting – no patterns and only using the knit stitch. I don’t like to spend free time knitting, I prefer to keep it my TV watching, long car ride riding, and flying activity. This is only possible for me if I don’t have to pay attention to a pattern or keep track of the number of stitches I’ve done in a given style. All I had to do for this blanket was count the number of rows to make sure they were even.

I made the blanket in five long columns that I then stitched together. I’m not sure I followed the stitching together part exactly as it’s stated in the original blog post. I just found a way to make it work for me. So far it’s all held together! The columns made it portable. One problem with a blanket is that by the end, it’s huge. This blanket was easy to take with  me on our travels to work on given that I only ever had to bring a piece that was about 8 inches wide.

IMG_8335_edited-1

It’s the perfect size to curl up in and watch TV (while working on the next project, of course!). ff you cuddle closely you can fit a second person under as well. I love that if I want to expand it at some point I can do so by knitting a sixth (or seventh or eighth) column.

IMG_5995-1_edited-1

Right now, it’s about 56 inches by 38.

IMG_8337_edited-1
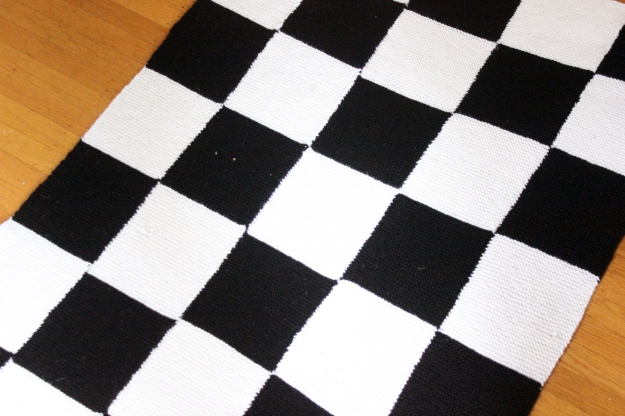
I didn’t keep very good stats on any projects I worked on while in school. I know I used eight skeins of each yarn and I’m pretty sure I got them on sale for $2.99. I might have bought a new pair of needles for the project but I’m not positive. In terms of time, I worked on this over the course of seven months, on and off. It took pretty much forever, but was an easy project to set down and pick up again later.

Project: 8/35
Time: no clue, but it was a marathon, not a sprint
Tutorial: checkered knit blanket
Cost: ~$30.00 (16 skeins of yarn on sale and a new set of knitting needles)

fall decorating

When I learned to sew last fall I set a goal of creating 35 projects by my 35th birthday (a.k.a. 35×35). Then I took ten months to pursue schooling in nutrition and find myself having completed six sewing projects with 14.5 months to go until my 35th birthday. I’m changing my goal to be 35 craft projects. The point was to try new things and use the creative side of my brain more, so I’m okay with whatever medium that comes in. It doesn’t always have to be cotton. IMG_8316_edited-1

I knew I wouldn’t have much time for fall decorating given my school finals, but I wanted to have a little something in the house. Last year, (my favorite blogger) Elise shared a felted garland she created as part of her handmade holiday series. I decided to change up the colors and use her instructions to make a fall garland for our table.
IMG_8317_edited-1Out of convenience I went to the Joanne’s that has much less variety and had to work with the felt they had available. In the end I really love the color combo of orange, green, purple, cream, and tan. Typically I am not a big fan of purple, but it works here.

IMG_8282_edited-1This project is incredibly cheap, easy and quick. I cut the fabric during one episode of Burn Notice and put together the garlands during a second episode. I ended up having about half the felt left when I was done with my first garland. I’m not sure if I misread something or if mine is that much shorter than Elise’s. Either way, I made a second garland and sent it to my sister for her table.

Project: 7/35
Time: 2 hours for 2
Tutorial: felted Christmas garland
Cost: $6.14 for both (1/4 yard of 5 felt colors; roll of twine)

candlesticks and placemats are both from Crate&Barrel (wrinkles not included); mini pumpkins were a gift from my MIL 

the pouf

IMG_8053_edited-1

As part of my efforts to finish the office update, I made us a pouf. We don’t have a coffee table in front of the couch in order to keep the space open, but we needed something to put our feet up on.  IMG_4392_edited-2

I’m not sure what it was about this project, but I found it really tedious and it took me months to finish. I bought fabric in January, cut it in February, sewed one half in March, and then finally finished it a week ago in May. It might be that I just have a lot going on and this felt like a project that I needed to finish but didn’t care much about by the time I sat down to complete it.

IMG_8055_edited-1

I’m not sure the pouf is going to last all that long. I think I might have overstuffed it, so the seems are already pulling a bit. For now, it’s serving it’s purpose as a foot rest at the desk or when we’re on the couch. 
IMG_8061_edited-1

Project: 6/35
Time: 3 hours
Tutorial: Sewing 101: Making a Pouf
Cost: $20 (that’s a guess, bought the fabric awhile ago and don’t have the receipt)